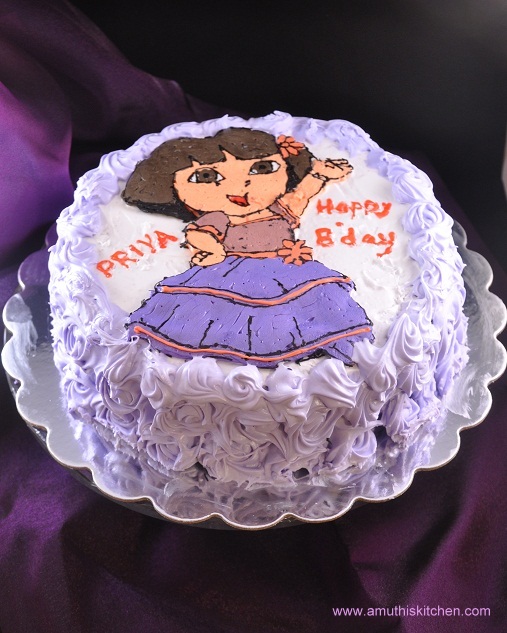
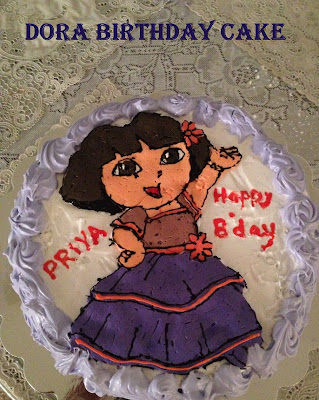
Two years back I knew nothing about neither baking nor cake decorations.It all started on my daughter's second birthday when I baked my first cake ever (Princess cake).It is hard to get egg less cakes here with so many design specifications. One of my college friends suggested me to bake a cake on my own and also gave me a basic recipe. She encouraged me to decorate as I used to do lot of paintings during my college days.After that there was no looking back. For every occasion I take orders(??) from my kids with exact specifications. Usually we celebrate our kid's birthday only with family and close friends and have never thrown a party.So I normally tend to pay attention to their cake and food menu needs. For this year my daughter's specifications were
1) Dora cake but no boots or swiper along with her.
2) Dora should wear her red or purple fiesta dress
3) No fondant. Only lots of butter cream icing
4) Chocolate flavor
The idea of using icing for Dora dreaded me. Though I can do some decent pencil sketches, I could not think of it with icing.Luckily I came across this wonderful tutorial for icing the cake when I was searching for Dora cakes over the net.I gained some confidence and I started to do the Dora icing on her birthday (As a plan B I had a small Dora figurine to fix on the cake!).I followed the instructions as per the tutorial except that I did not use a glass as mentioned in the post.I just stapled a print out of Dora with wax paper and I was able to manage When I peeled the wax paper, the beautiful Dora amazed us.Yes it really worked. Now on to the tutorial
What you need:
9" chocolate cake
9" vanilla cake
Buttercream icing - I don't remember the measurement as I mixed as and when needed. All that I know is it took a quite a lot as piped roses on the sides with 1M Wilton tip
Procedure:
Place the chocolate cake at the bottom.
Apply some icing over the chocolate cake
Place the vanilla cake
Crumb coat the cake and let it sit for sometime
Take a print of your favorite Dora picture/or any picture
Place a wax paper on top and staple it
Mix the colors that you need
Take the icing and first draw the details.For the details #1 round tip can be used.If you don't have that it is fine. Just use a normal zip lock bag with the corner cut to the desired length
Then apply the icing for the larger layers (Remember this will be reversed.So the details that you applied in the previous step will come on top)
Make sure that the icing you applied is at least 1/4 inch thick.
I know that the icing will not look appealing at this stage. (My husband was teasing me that the Dora looks like ghost!). don't pay attention and put it in freezer along with wax paper.
Chill for atleast 30 minutes or the icing is little hard to touch
Meanwhile work on the side decoration for the cake.
I used a 1M star tip to pipe roses which is a time saving frosting method(Refer to I am the baker for video tutorial)
Now take the wax paper and invert the design on top of the cake
Peel the wax paper.Viola the beautiful Dora is unveiled
Notes:
- Make sure the icing is hard when taking out of the freezer
- The design should be applied to the cake quickly before it softens. When I applied, Dora's right hand softened a little bit and it broke. But anyway I was able to fix this later
- The rosettes did not come out perfect for me.Maybe the buttercream that I prepared was too thin.Hope to get this better next time.


it is beautiful... really really pretty...wow wow wow wow wow... and thanku so much for the detailed steps... u r one amazing mom....
ReplyDeleteBeautiful and stunning Dora cake.
ReplyDeletewow, such a beautiful cake..awesom3 frozen buttercream transfer,..I want to try the butter cream transfer too..will try it for kids birthday next time
ReplyDeleteLovely cake,great work
ReplyDeleteWow ! Awesome explanation and clicks.... Thanks for it..
ReplyDeletehttp://recipe-excavator.blogspot.com
Wow... lovely Dora Cake...thanks for the tutorial
ReplyDeleteWow.... lovely Dora Cake..thanks for the tutorial
ReplyDeleteWow....lovely Dora Cake...thanks for the tutorial
ReplyDeleteGorgeous cake!!!!
ReplyDeletePrathima Rao
Prats Corner
That's awesome and too cute.Perfectly done and nice stepwise explanations.
ReplyDeletehttp://sabdhaskitchen.blogspot.in
WOW! Great work! Dora is cute! hope your daughter had a wonderful Birthday!
ReplyDeleteSo beautifully decorated dear... Birthday wishes to ur cutie
ReplyDeleteamazing and lovely cake.. dora looks cute :)
ReplyDeleteMy daughter was asking for dora cake as well..but since it was my first attempt I did not want to experiment...but with the method mentioned here I will surely give it a try.
ReplyDeletethe cake looks lovely
Hi Shylaja,beautiful cake..great work..!
ReplyDeleteWow what a lovely cake...belated happy birthday to priya...now can I have a one slice please?
ReplyDeleteஆஹா அற்பதமான டெகரேஷன்..சூப்பர்ர்!!
ReplyDeleteAwesome pictorial....love the way you mastered the icing.....keep up the good work...
ReplyDeleteSooper cool tips,n beautiful cake dear..looks very beautiful!!!
ReplyDeleteWow beautiful step by step pics,you did it perfectly,great job
ReplyDeletebeautifully done.. Nice presentation
ReplyDeleteHow cool is that? I had no idea of this transfer method... Love it and can;t wait to try it soon. Loved the piped roses.. beautifully done. Thanks for this cool tip and am sure your daughter was thrilled.. Birthday wishes to her!
ReplyDeletevery beautiful cliks..n nice presentation dear..
ReplyDeleteWow..awesome looking cake...Loved the transferring idea..Great detailed post..
ReplyDeleteAmazing idea. Your family is lucky to have you.
ReplyDeleteThank you so much for sharing this! My daughter lives Dora and i'm so not artistic! Thank you for the step-by step instructions that even I can follow!
ReplyDeleteThank you. This method is very simple to try.All the best
DeleteThats amazing! Thank you so much for sharing. We are going to try this for my daughter's first bday.
ReplyDeleteThank you so much for sharing! This is amazing! We are going to try this for my daughter's first bday.
ReplyDelete